How to Turn on Wifi in Windows 7 Lenovo Laptop
Your Lenovo laptop doesn't detect the wireless network? This is frustrating. But don't worry. You can fix your problem quite easily. This post has put together some fixes for you to resolve Lenovo laptop not detecting wireless network.
Try these fixes
Here are solutions to try. You shouldn't have to try them all; just work your way down the list until your laptop connects to WiFi.
- Troubleshoot your problem
- Make sure the wireless switch is ON
- Enable the wireless adapter
- Update your wireless adapter driver
- Enable WLAN AutoConfig service
- Configure Power Management for your wireless adapter
- Add your wireless network manually
Note: the screenshots below come from Windows 10, and fixes also apply to Windows 8 and Windows 7.
Fix 1: Troubleshoot your problem
Before getting started, you should troubleshoot and locate your problem, so as to know where your problem lies: your WiFi or your laptop.
It's simple. Just try to detect and connect to your wireless network using another device, such as PC, smartphones, etc. If other devices can't detect your WiFi at all, then it's your WiFi issue and you'll need check your WiFi router or head to your ISP; if other devices detect and connect to your wireless network successfully, it's no doubt a problem of your Lenovo laptop, and follow the steps below to fix your problem.
Fix 2: Make sure the wireless switch is ON
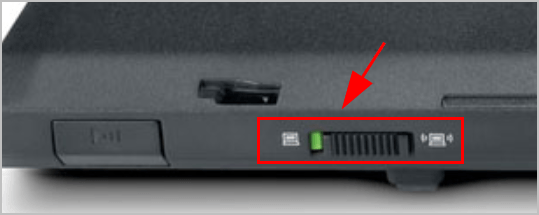
There is a hardware switch on some Lenovo laptops that allows users to turn on and off the wireless network feature. The switch usually lays on the edge sides on your laptop. Check your Lenovo laptop and try to switch the button to ON.
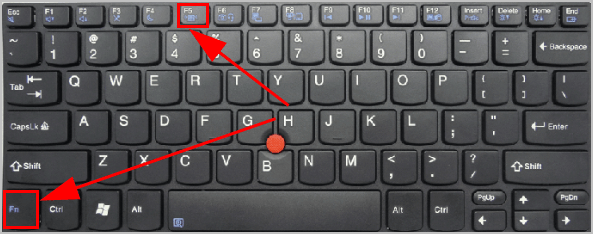
If you don't see a hardware switch, don't worry. Most Lenovo laptops allows user to enable wireless network by pressing a keyboard combination, such as Fn and F5 keys. Then you may also see a pane pops up, and turn on the wireless network.
If you've turned on the wireless network feature but your laptop can't detect WiFi, don't worry. Move to the next solution.
Fix 3: Enable the wireless adapter
If your wireless adapter has been disabled, your laptop wouldn't be able to detect any WiFi or connect to WiFi. So be sure to enable wireless adapter for your lenovo laptop.
Here's how to do it:
1) On your keyboard, press the Windows logo key and R at the same time to invoke the Run box.
2) Type devmgmt.msc and click OK.

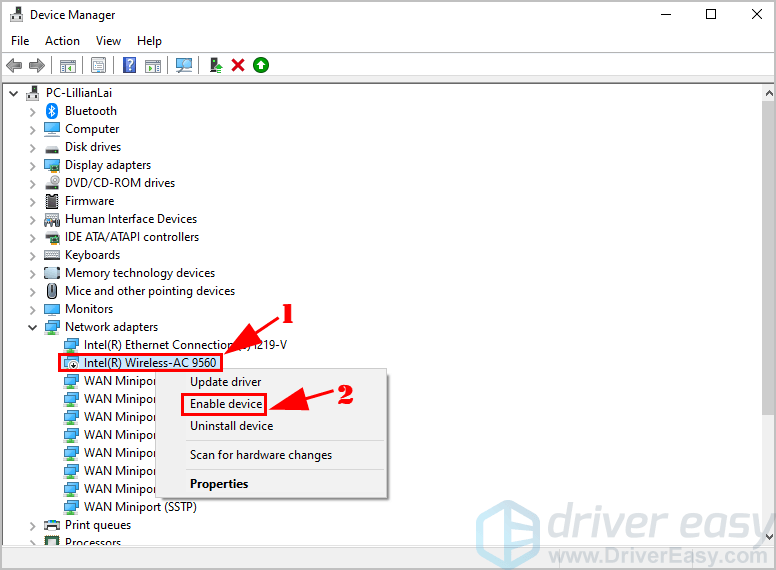
3) Double click Network adapters, and right click on your wireless network adapter to choose Enable device.
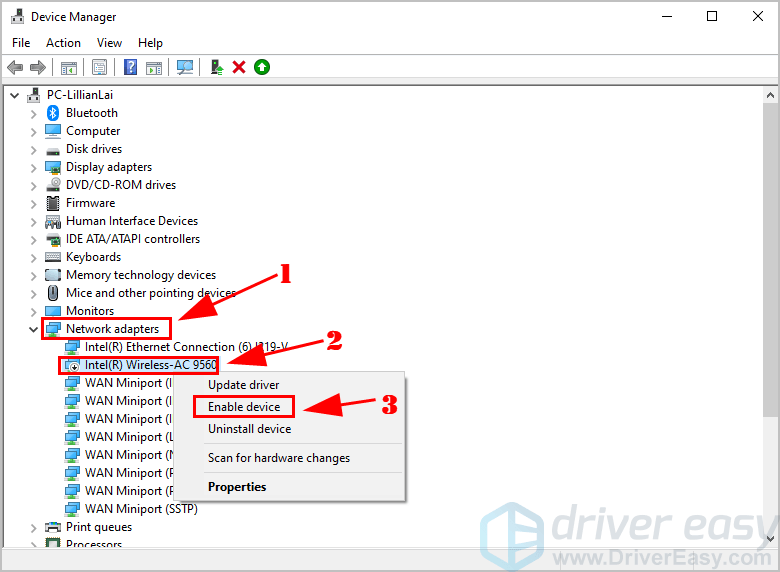
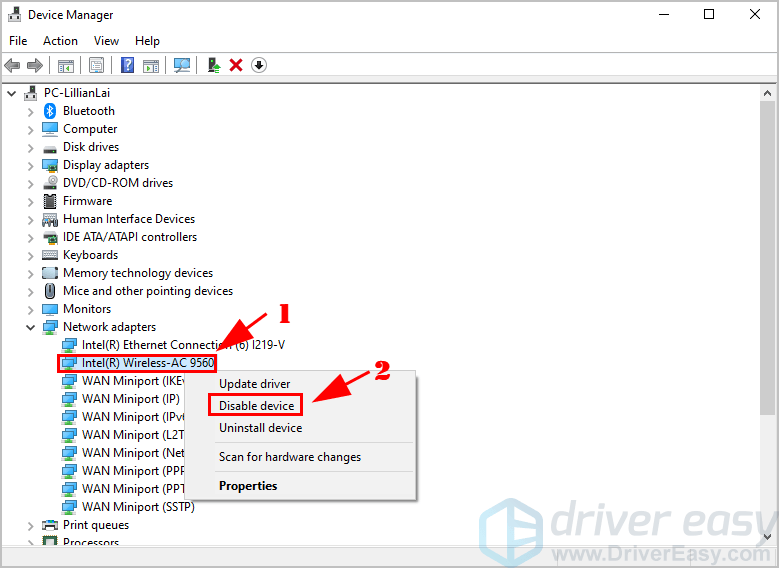
If you see Disable device in the right-click context menu, that means that your wireless network is enabled already, then click Disable device and then Enable device.
4) Now restart your laptop.
Try to connect to your wireless network and see if it works.
Fix 4: Update your wireless network adapter driver
If your network adapter driver is missing or corrupted, you'll have network issues such as not recognizing your wireless network. So be sure to update your wireless network adapter driver to the latest version.
There are two ways to update your network adapter driver: manually and automatically.
Note: you'll need to connect to the Internet in order to update your driver. You can try connecting via Ethernet connection, then to download and install your wireless network driver.
Manually update drivers – You can manually update your WiFi driver by downloading the latest version of your driver from manufacturer, and installing it in your computer. This requires time and computer skills.
Automatically update drivers – If you don't have time or patience, you can do it automatically with Driver Easy.
Driver Easy will automatically recognize your system and find the correct drivers for it. You don't need to know exactly what system your computer is running, you don't need to risk downloading and installing the wrong driver, and you don't need to worry about making a mistake when installing.
You can update your drivers automatically with either the FREE or the Pro version of Driver Easy. But with the Pro version it takes just 2 clicks (and you get full support and a 30-day money back guarantee):
Note: Driver Easy enables you to update your network adapter driver without Internet connections! Check the Offline Scan feature to know how to update your wireless network adapter driver.
1) Download and install Driver Easy.
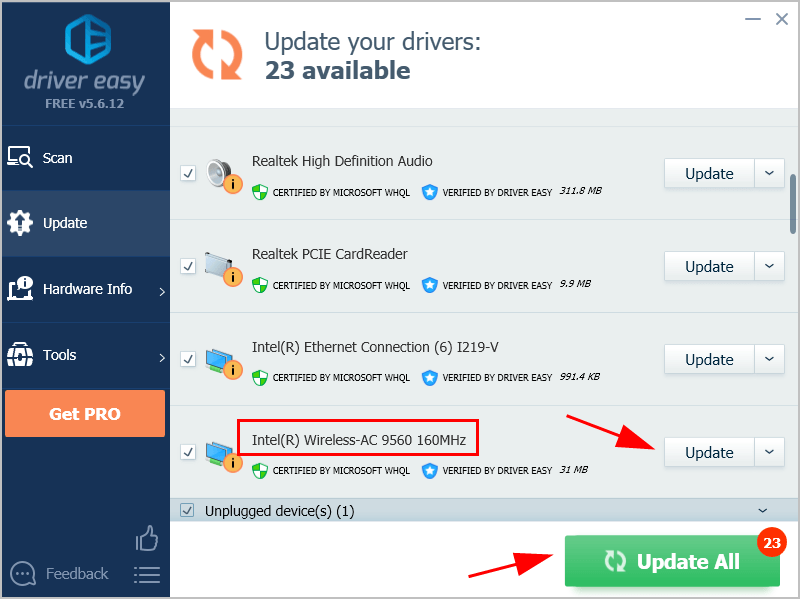
2) Run Driver Easy and click the Scan Now button. Driver Easy will then scan your computer and detect any problem drivers.

3) Click the Update button next to the wireless network adapter and to automatically download the latest drivers (you can do this with the FREE version). Then install the drivers in your computer.
Or click Update All the automatically download and install the correct version of all the drivers that are missing or out of date on your system (this requires the Pro version – you'll be prompted to upgrade when you click Update All).
4) Restart your computer to take effect.
Now connect to your wireless network and see if it works.
If your Lenovo laptop is not detecting your WiFi, don't give up hope. There are other solutions to try.
Fix 5: Enable WLAN AutoConfig service
WLAN AutoConfig service provides the logic required to configure, discover, and connect to, and disconnect from a wireless network. So this is a critical service that decides whether your Lenovo laptop detects wireless networks or not.
You should set the WLAN AutoConfig service to running. Follow these steps:
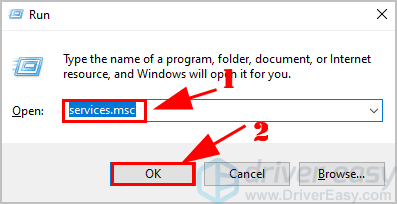
1) On your keyboard, press the Windows logo key and R at the same time to invoke the Run box.
2) Type services.msc and click OK.
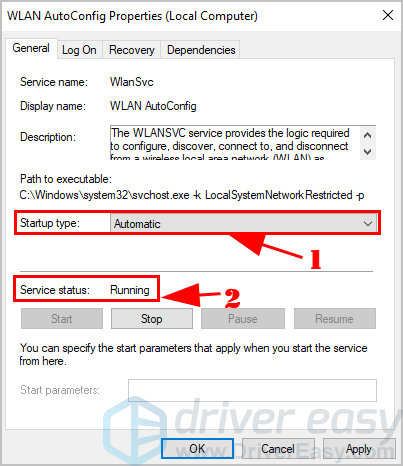
3) Scroll down and double click WLAN AutoConfig.
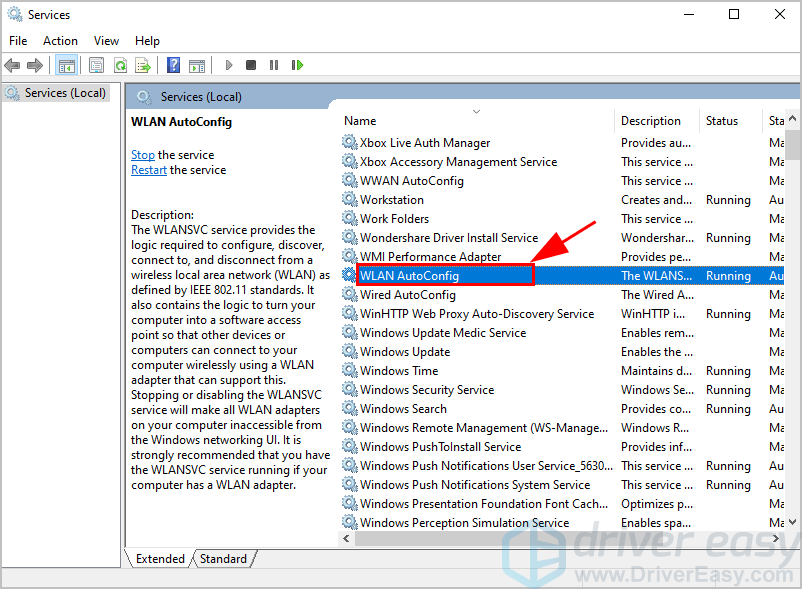
4) Under the General tab, set the Startup type to Automatic, and make sure the Service status is Running.
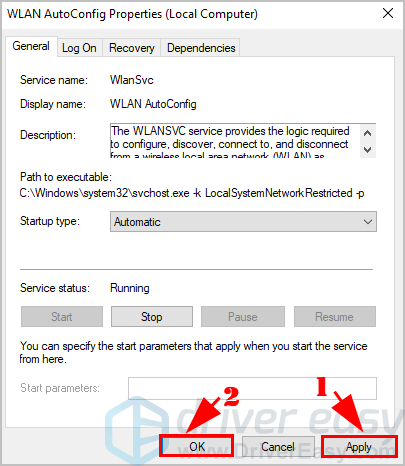
5) Click Apply and OK to save your changes.
Now turn on WiFi feature and see if wireless networks can be detected.
Fix 6: Configure Power Management for your wireless adapter
There is one power management setting for your wireless adapter that may affect your wireless network feature, especially in your laptop.
Here's what you need to do:
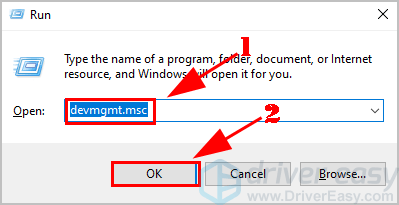
1) On your keyboard, press the Windows logo key and R at the same time to invoke the Run box.
2) Type devmgmt.msc and click OK.
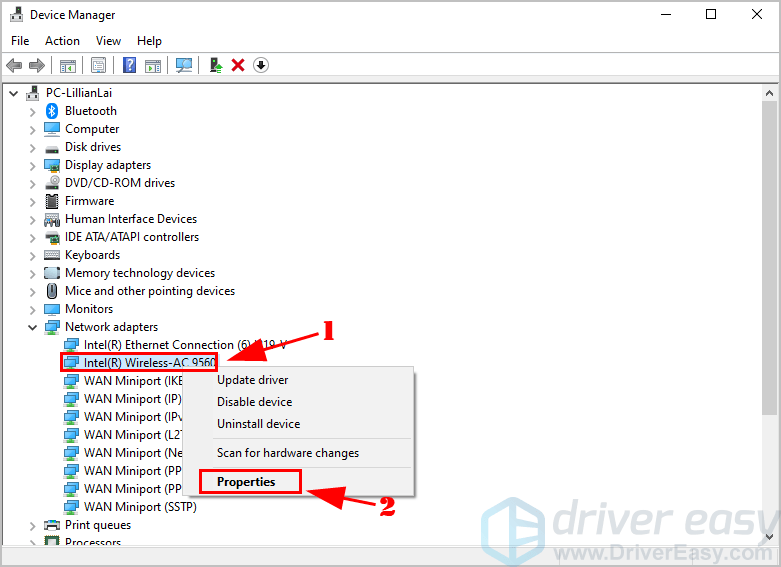
3) Double click Network adapters, and right click on your wireless network adapter to choose Properties.
4) Click the Power Management tab, and uncheck the box next to Allow the computer to turn off this device to save power, then click OK.
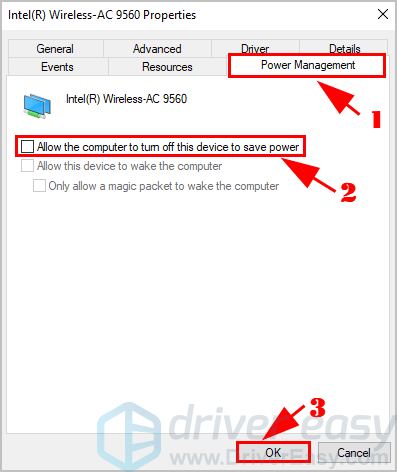
In doing so, your wireless adapter won't be disabled to save power.
5) Restart your computer and try to connect to your WiFi networks.
Still no luck? Okay, there is one more thing to try.
Fix 7: Add your wireless network manually
If your Lenovo laptop can't detect wireless networks after the methods above, you can manually add your WiFi to your laptop and connect to it.
Here's what you need to do:
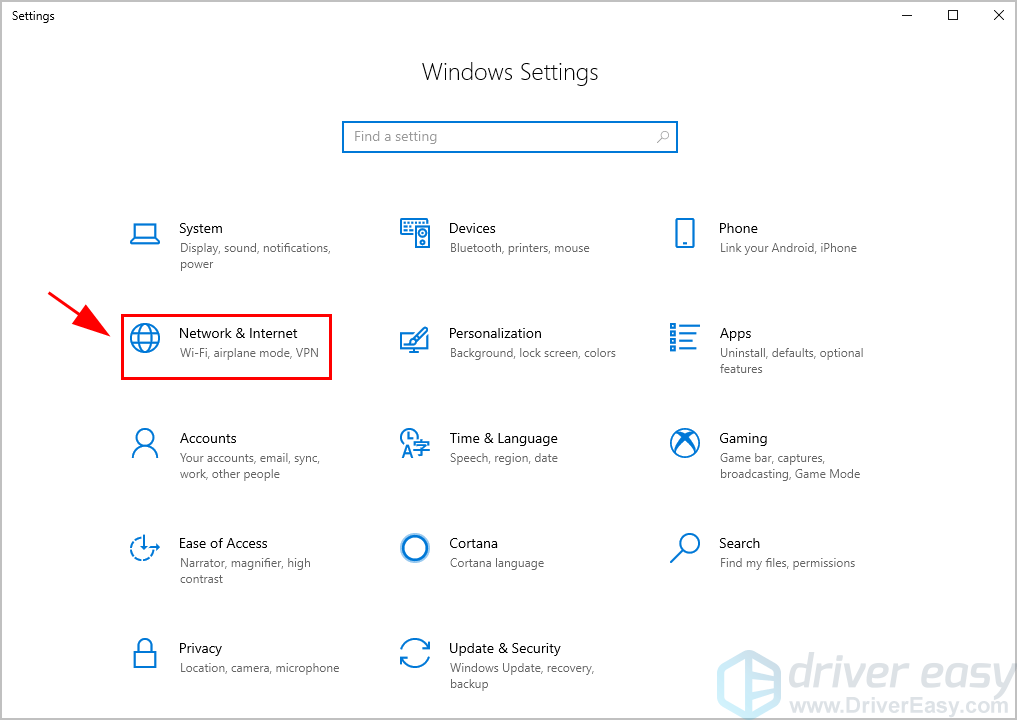
1) On your keyboard, press the Windows logo key and I at the same time to open the Settings app.
2) Click Network & Internet.
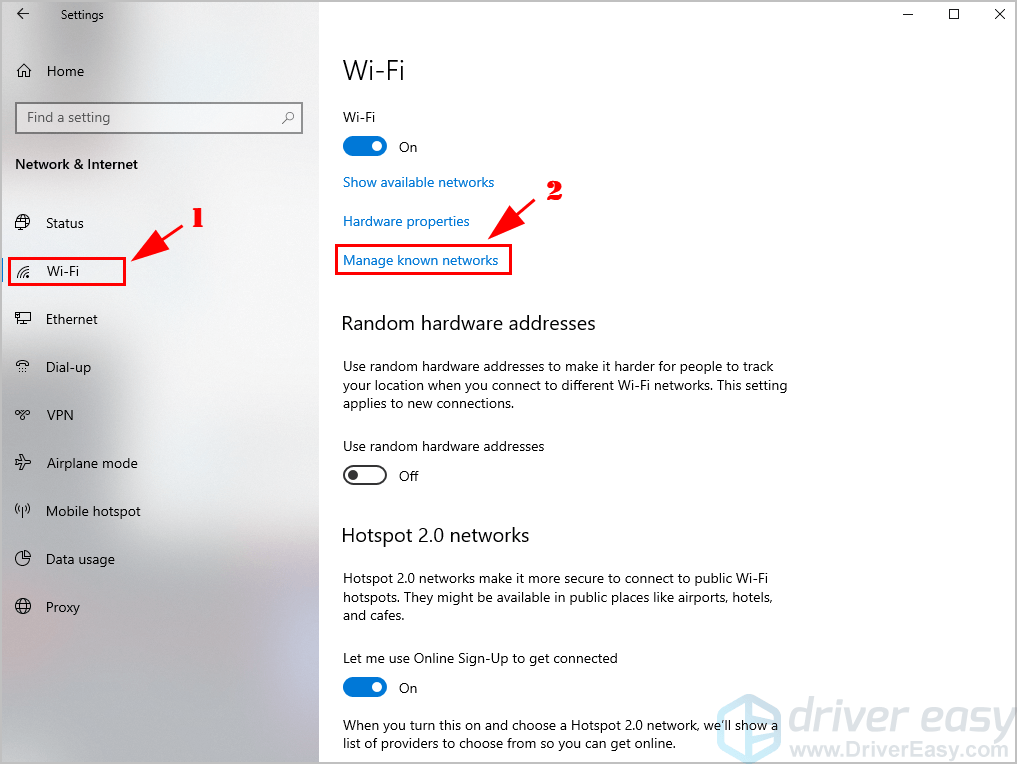
3) Click WiFi on the left, then click Manage known networks.
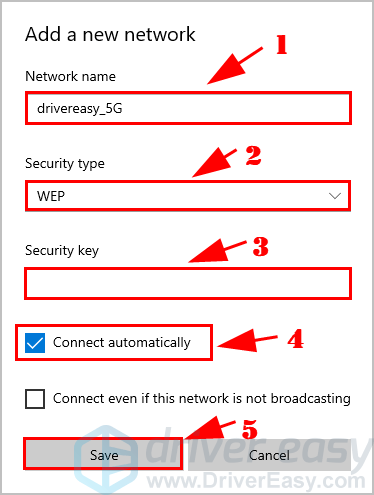
4) Click Add a new network.
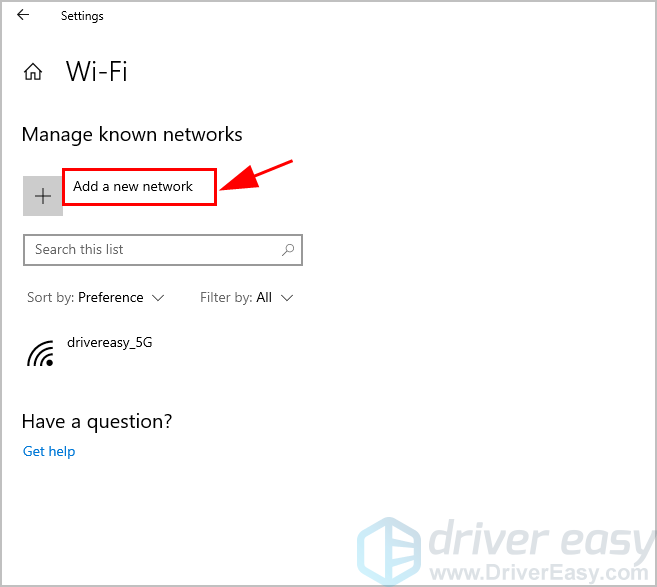
5) Enter the required information on the popup, including Network name, Security type. And check the box next to Connect automatically, then click Save.
6) Click the Internet icon at the bottom right corner and you should be able to find your wireless network. Click it to connect.

So that's it. Hope this post comes in handy when you com across the Lenovo laptop not detecting wireless network issue. If you have any questions, feel free to leave us a comment below.
How to Turn on Wifi in Windows 7 Lenovo Laptop
Source: https://www.drivereasy.com/knowledge/fixed-lenovo-laptop-not-detecting-wireless-network/
0 Response to "How to Turn on Wifi in Windows 7 Lenovo Laptop"
Post a Comment